Introduction to Astrophotography
What Is Astrophotography?
Astrophotography is the art and science of capturing celestial objects like stars, planets, nebulae, the Milky Way, and galaxies using a camera—often with long exposures and special gear. It combines photography, astronomy, and technical setup to create stunning visuals of the night sky that reveal what the human eye can’t see alone.
Whether you’re shooting the full moon from your backyard or capturing faint nebulae from a dark-sky site, astrophotography opens a door to the cosmos.
🧭 Where Do I Start?
Astrophotography can be approached at three levels, depending on your budget, time, and interest:
Absolutely! Here’s an expanded and fully detailed version of the Beginner Level – “Just Get Out and Shoot” section for your astrophotography WordPress site. This includes detailed explanations of each component, shooting scenarios, tips, and recommendations to make it truly beginner-friendly and informative.
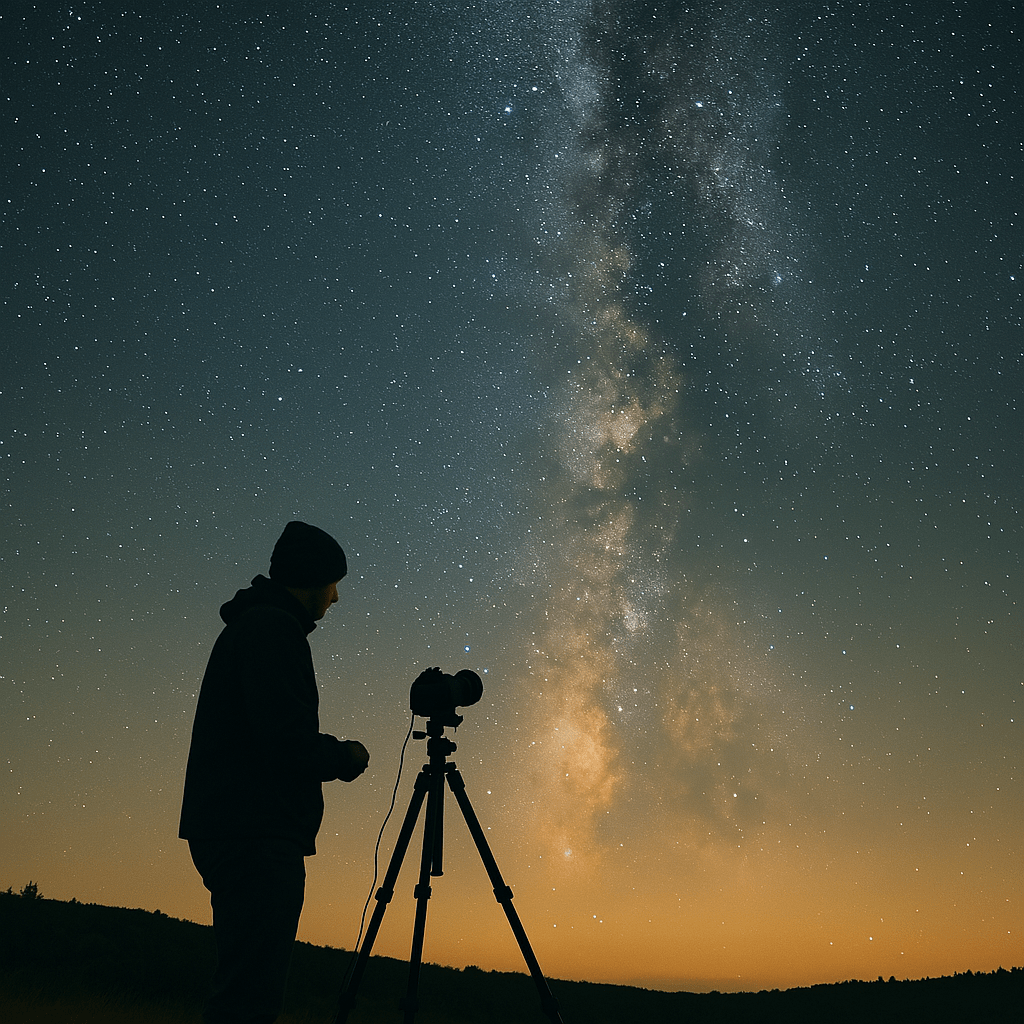
🟢 Beginner Level – “Just Get Out and Shoot”
This is the perfect place to start if you’re new to astrophotography. No complicated mounts or expensive gear needed—just a camera, a clear night, and some curiosity.
🌠 What Can You Capture at the Beginner Level?
With a simple camera setup, you can photograph some truly stunning night-sky scenes:
- 🌌 The Milky Way : The Milky Way is one of the most breathtaking sights in the night sky and a dream subject for beginner astrophotographers. It’s our home galaxy, and during certain months of the year—particularly from March to September in the Northern Hemisphere—you can see its glowing core stretching like a river of stars across the sky. The best views occur during new moon phases and from dark sky locations rated Bortle 1 to 4, far from city lights. To photograph the Milky Way, all you need is a DSLR or mirrorless camera, a sturdy tripod, a wide-angle lens (ideally 14–24mm with an aperture of f/2.8 or faster), and a remote shutter or intervalometer. Set your camera to manual mode with a shutter speed of 15–25 seconds, ISO between 1600 and 3200, and the widest possible aperture. Focus manually on a bright star using live view zoom. The 500 Rule (500 divided by your lens focal length) helps prevent star trails. Apps like PhotoPills and Stellarium are great for timing your session and locating the Milky Way core. Don’t forget to include a foreground element like a tree or mountain for dramatic composition.
- 🌟 Star Trails — Star trails offer a magical look at the rotation of the Earth, producing circular or arcing patterns of light as stars appear to move through the sky. Unlike typical astro shots where you freeze stars as sharp points, this technique embraces motion. You can shoot star trails any clear night—even under moderate light pollution. All you need is a DSLR or mirrorless camera on a stable tripod with an intervalometer to take repeated 25–30 second exposures over one to three hours. Settings around ISO 800–1600 work well, with your lens set to its widest aperture. After your session, stack the frames using free tools like StarStaX. Pointing your camera toward the North Star (in the Northern Hemisphere) or the southern celestial pole (in the Southern Hemisphere) results in stunning circular trails. Including a foreground subject, like a tree or rock formation, adds context and storytelling to your image. Just remember to keep your ISO moderate to avoid sensor heat or hot pixels in your images.
- 🌙 The Moon — The Moon is the most accessible celestial target—bright, detailed, and always changing. Whether you’re shooting a full moon, crescent, or capturing crater details with a telephoto lens, it’s a great subject for all skill levels. You don’t need a tracking mount. A DSLR or mirrorless camera paired with a telephoto lens in the 200–600mm range on a tripod is all you need. For best detail, avoid shooting during the full moon; instead, photograph during the crescent or quarter phases when the shadows along the terminator line create dramatic contrast. Use manual mode with a shutter speed between 1/250s to 1/500s, ISO 100–400, and an aperture of f/8 to f/11. Set your metering to spot mode and white balance to daylight. Use live view to zoom in and focus manually. Shooting during the blue hour or just after sunset can also capture Earthshine—when the dark side of the Moon is gently illuminated.
- 🌑 Lunar Eclipses — A lunar eclipse is a striking event when the Earth blocks sunlight from directly reaching the Moon, casting it in shadow and often turning it a deep red or copper color. Total lunar eclipses are the most photogenic and occur a few times each year, visible depending on your location. To capture this event, use a DSLR or mirrorless camera on a tripod with a telephoto lens or small telescope. Use an intervalometer if you want to capture a time-lapse of the entire eclipse. During the partial phases, use faster settings—around 1/200s shutter speed and ISO 100–400. During totality, when the Moon darkens significantly, you may need to go up to a 2-second exposure at ISO 800–3200. Keep your aperture at f/5.6 or faster. Bracket your exposures to account for brightness changes, and if possible, take photos at regular intervals to create a beautiful collage showing the Moon’s progression through each phase of the eclipse.
- ✨ Meteor Showers —Meteor showers are a spectacular way to photograph brief flashes of light caused by space debris burning up in Earth’s atmosphere. Major meteor showers like the Perseids (August), Geminids (December), and Quadrantids (January) offer peak rates of up to 100 meteors per hour. The best time to shoot is after midnight, when the radiant (the shower’s origin point) is highest in the sky. Use a DSLR or mirrorless camera with a wide-angle lens on a tripod, and set an intervalometer to take continuous exposures for one to three hours. Use settings like 15–25 second shutter speed, ISO 3200 or higher, and f/2.8 or faster aperture. Point your camera in the general direction of the radiant but include a large portion of the sky. Even under moderately dark skies, you can catch multiple meteors in a single frame or combine them in post-processing. It’s often about patience—shoot continuously and let the sky surprise you.
- 🪐 Conjunctions — Planetary conjunctions occur when two or more planets appear close together in the sky, often forming stunning alignments with the Moon or bright stars. These events happen a few times a year and can produce incredible photos, especially at twilight. You’ll often see planets like Jupiter, Venus, Saturn, or Mars near each other or aligned with the Moon. To capture them, use a standard or telephoto lens (50–200mm) on a tripod. Frame the planets low in the sky just after sunset or before sunrise, ideally with a scenic foreground. Shoot in manual mode with a shutter speed of 1–4 seconds, ISO 400–1600, and aperture between f/2.8 to f/5.6 depending on your lens. Use live view to manually focus on the brightest planet. For more impact, plan ahead with apps like Stellarium or Sky Guide to find the exact position of the conjunction from your location.
📷 Beginner Gear Breakdown
You may already have most of this gear at home. Here’s a list of beginner-friendly equipment to get started:
✅ DSLR or Mirrorless Camera
- Brands: Canon (e.g. Rebel T7i), Nikon (D5600), Sony (A6000 or A7ii)
- Key features to look for:
- Manual mode (M)
- Ability to shoot RAW
- Good high ISO performance
✅ Lens
- Wide-angle lens (14mm–35mm) for Milky Way and nightscapes
- Zoom lens (e.g. 55–250mm) for capturing the Moon
- Aperture f/2.8 or lower is ideal to gather more light
✅ Tripod
- Sturdy and stable—your best friend for long exposures
- Ball-head or pan-tilt heads are both fine
✅ Remote Shutter or Intervalometer
- Prevents camera shake during long exposures
- Intervalometers allow time-lapse shooting and stacking frames
✅ Useful Apps
- Stellarium: Plan your target positions
- PhotoPills: Check moon phases, Milky Way core rise times, and field of view
- Sky Guide / Sky Map: Identify constellations and planets
📸 Camera Settings to Start With
These are not rules—just a solid starting point!
For Milky Way or Stars (wide-field):
- Mode: Manual (M)
- Shutter: 15–25 seconds (use the 500 Rule: 500 ÷ focal length = max exposure time)
- ISO: 1600–3200
- Aperture: f/2.8 or wider
- Focus: Manual focus to infinity (use live view + zoom in on a bright star)
For the Moon:
- ISO: 100–400
- Shutter: 1/250s – 1/500s
- Aperture: f/8 to f/11
- White balance: Daylight or auto
- Tip: Lower ISO to avoid overexposing moon details
🗓 When and Where to Shoot
- Dark Sky Sites: Use light pollution maps (lightpollutionmap.info) to find locations
- Moonless Nights: For Milky Way or meteor showers
- Golden Hours: 1–2 hours after sunset or before sunrise
- Summer: Milky Way core visible (April–September in the Northern Hemisphere)
- Winter: Constellations like Orion dominate the sky
Even suburban skies can show the Moon and bright constellations—don’t let light pollution stop you from starting!
🌍 Basic Techniques You’ll Learn
- How to compose a sky shot with foreground (trees, mountains, buildings)
- How to manually focus on stars without autofocus
- How to reduce noise with multiple images and stacking
- How to shoot RAW and do basic editing in Lightroom or Snapseed
- How to create star trail composites using free software (e.g., StarStaX)
✅ Pros of Starting at This Level
- Affordable – Use existing gear or start under $500
- Lightweight – Easily hike or travel with minimal equipment
- Fast Setup – Ready to shoot in minutes
- Instant Results – Great feedback loop for learning
- No Tracking Needed – You can shoot untracked wide-angle exposures
⚠️ Limitations to Be Aware Of
- Limited to short exposures (before stars trail)
- Not ideal for deep sky objects like galaxies or nebulae
- Requires careful planning to avoid light pollution or moonlight
- You may outgrow it quickly once you see what’s possible with tracking/mounts
🧠 Bonus Beginner Tips
- Bring extra batteries—long exposures drain power quickly.
- Turn off image stabilization (IS/VR) when on a tripod.
- Use manual white balance to avoid strange sky colors.
- Practice daytime manual focus so you’re ready in the dark.
- Shoot in RAW for maximum editing flexibility.
🌌 Realistic Results You Can Expect
| Object | Shot Type | Results You Can Get |
|---|---|---|
| Milky Way | Wide-angle | Bright galactic core with foreground |
| Star Trails | Long exposure | Circular trail patterns |
| Moon | Telephoto | Craters, terminator line |
| Conjunctions | Standard lens | 2–3 planets aligned |
| Meteor Showers | 15–30s exposures | Few streaks per frame |
Want to see examples? [Link to your personal gallery or sample post]
Absolutely! Here’s the expanded and detailed Intermediate Level section for your “Get Started” page on your astrophotography website. This content is written to be beginner-friendly, technically informative, and WordPress-ready. It includes gear breakdowns, ideal targets, camera settings, tracking guidance, pros and cons, and much more.
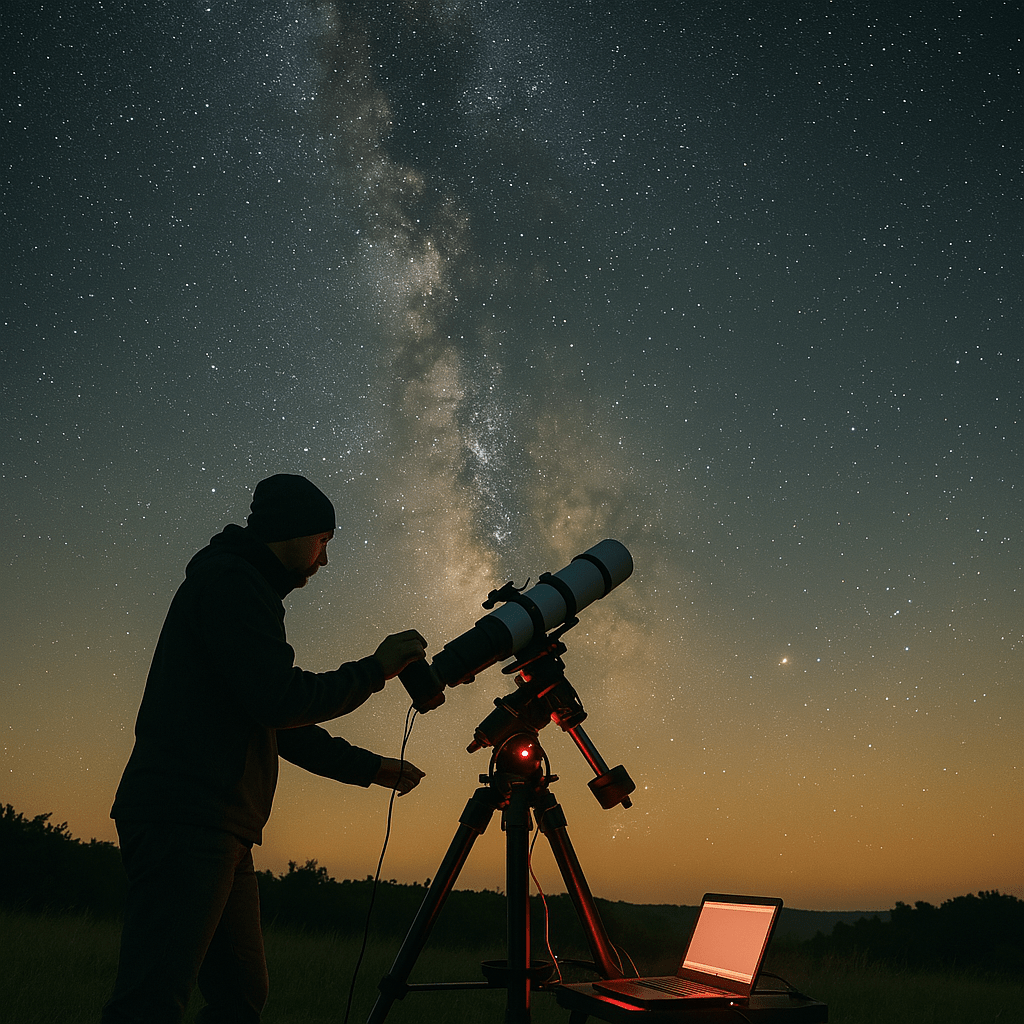
🟡 Intermediate Level – “Getting Serious”
If you’ve already tried shooting the Milky Way or the Moon and are ready to dive deeper into the night sky, this is the stage for you. The intermediate level opens the door to deep sky imaging—capturing nebulae, galaxies, and other faint cosmic wonders. At this level, you’ll learn how to track the stars, take long exposures, and edit stacked images for much more detailed results.
🌌 What You Can Capture at the Intermediate Level
At this stage, you’ll be able to photograph many iconic deep sky objects, especially from a dark sky site.
- 🌠 Nebulae – Like the Orion Nebula (M42), North America Nebula (NGC 7000), and Rosette Nebula
- 🌌 Galaxies – Including Andromeda (M31), Triangulum (M33), Bode’s Galaxy (M81)
- 🌓 The Moon – High-resolution close-ups and mosaics
- 🔭 Star Clusters – Like the Pleiades (M45), the Double Cluster
- 🪐 Planets – Wide-field shots of planetary positions (planetary imaging needs higher magnification setups)
🛠 Gear Needed for Intermediate Astrophotography
You’re now introducing tracking, possibly a telescope, and better cameras.
✅ Camera Options
- DSLR or Mirrorless: Still good choices; consider getting one modified for H-alpha (for better nebula capture).
- One-Shot Color (OSC) Cameras: Dedicated cooled astro cameras like ZWO ASI533MC Pro, ASI2600MC Pro
- Pros: Color images in one shot, lower noise due to cooling
- USB-powered, often requires a laptop or ASIAIR for control
✅ Tracking Mount / Star Tracker
- Essential for long exposures!
- Popular options:
- Sky-Watcher Star Adventurer 2i
- iOptron SkyGuider Pro
- MoveShootMove (for wide lenses only)
- Allow you to track Earth’s rotation and take exposures of 1–5+ minutes without star trailing
✅ Lens or Telescope
- Telephoto Lens (100mm–300mm) for portability and wide targets
- Small Refractor Telescope:
- Examples: William Optics Zenithstar 61, RedCat 51, Askar FMA180 or 230
- Benefits: Sharp stars, flat field, light weight
✅ Guiding Scope + Camera (Optional but useful)
- Helps improve tracking accuracy for longer exposures
- Example: ZWO 30mm mini guide scope + ASI120MM guide camera
- Software: PHD2 guiding (works with most mounts)
✅ Filters
- Light Pollution Filters (e.g., Optolong L-Pro, IDAS D1) help retain color and contrast under city skies
- Dual-Band Filters (L-eXtreme, L-Ultimate) for strong emission nebulae in light pollution
✅ Control Devices
- Laptop with NINA, ASIAIR Plus, or ZWO Studio
- External batteries (Jackery, Power Bank) for remote setups
📸 Camera Settings & Image Capture
With Tracker (Wide-Field/Telephoto):
- Mode: Manual
- ISO: 800–1600 (lower ISO with cooled camera)
- Shutter: 60–300 seconds depending on tracking accuracy
- Aperture: f/4–f/5.6 for lenses
- File Format: RAW
- Focus: Manual on bright star using Bahtinov mask or live view
Calibration Frames Needed:
- Darks – Reduce sensor noise
- Flats – Correct vignetting/dust
- Bias – Optional for older cameras
🧪 Post-Processing Workflow
This is where intermediate astrophotography really shines. You’ll learn to:
- Stack images using:
- DeepSkyStacker (Windows)
- SiriL (Mac/Linux/Windows)
- ASTAP
- Stretch the data to reveal faint detail
- Correct gradients caused by light pollution
- Remove noise & sharpen stars
- Adjust color balance & saturation
- Optional: Learn PixInsight for advanced workflows
🗓 When and Where to Shoot
- New Moon or 3–4 days around it
- Dark Sky Sites: Bortle 1–4 zones ideal (use Light Pollution Map)
- Summer: Milky Way core, nebula-rich areas (Sagittarius, Cygnus)
- Autumn–Winter: Andromeda, Triangulum, Pleiades, Orion
“At this stage, light pollution is your main enemy. Try to travel to darker skies whenever possible.”
📈 Pros of Intermediate-Level Astrophotography
- High image quality without ultra-expensive gear
- Access to deep sky imaging from home with narrowband filters
- Introduction to guiding, calibration, and image stacking
- Modest refractors are forgiving and easy to manage
- Still portable enough to take to dark sites
⚠️ Challenges to Prepare For
- Requires learning curve in polar alignment, stacking, and guiding
- Gear management becomes more complex (cables, power, dew control)
- Initial investment is higher ($1000–$2500 range)
- Laptop control or an ASIAIR-like device is almost necessary
🌌 Sample Imaging Setups
| Budget | Sample Gear | Sample Targets |
|---|---|---|
| ~$1000 | DSLR + Star Tracker + Telephoto Lens | Andromeda, Orion |
| ~$1500 | OSC Camera + Star Tracker + RedCat 51 | Rosette, California Nebula |
| ~$2000 | OSC Camera + Refractor + Guide Scope + Laptop | Veil, Heart, North America Nebula |
🧠 Bonus Tips for Intermediate Shooters
- Use a Bahtinov Mask to achieve perfect focus
- Start with bright targets like Orion Nebula or Andromeda
- Keep a checklist for field setup (camera, cables, dew heater, power, etc.)
- Learn how to balance your mount properly before tracking
- Join forums or Discords (e.g., AstroBin, Cloudy Nights) to share and learn
Would you like this content as a modular WordPress import, Elementor layout, or a downloadable guide for your users? I can also create a PDF handout version for your visitors to download and keep.
Absolutely! Here’s the expanded and detailed Intermediate Level section for your “Get Started” page on your astrophotography website. This content is written to be beginner-friendly, technically informative, and WordPress-ready. It includes gear breakdowns, ideal targets, camera settings, tracking guidance, pros and cons, and much more.
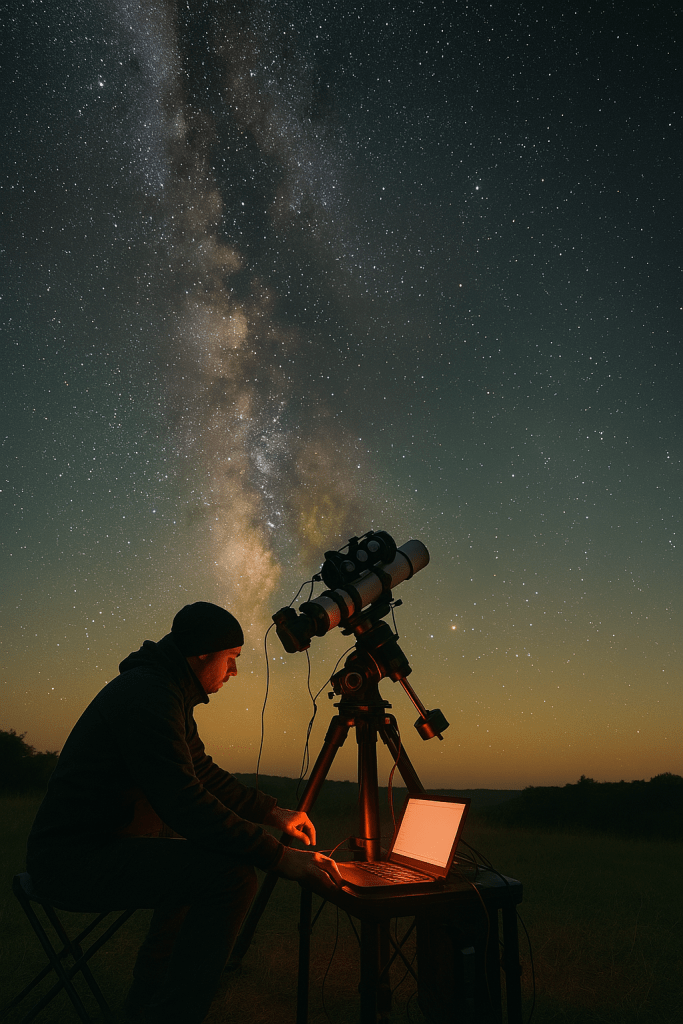
🔵 Expert Level – “Deep Sky Mastery”
At this level, you’re no longer just taking pictures—you’re capturing data. You have control over every aspect of the imaging process, from filter choice to pixel math. Expert-level astrophotography gives you the ability to shoot faint nebulae, build multi-panel mosaics, and create scientific-grade images with high-resolution mono sensors and narrowband filters.
🌌 What You Can Capture at the Expert Level
The universe is fully open to you now. With advanced gear, long exposures, and post-processing mastery, you can capture:
- 🔥 Emission Nebulae — like the Heart, Soul, Pelican, and Jellyfish Nebulae
- 🌈 Narrowband Targets — like the Crescent Nebula or Eastern Veil with rich color palettes
- 🌀 Galaxies — including faint ones like M101, NGC 891, or multi-galaxy clusters
- 🌙 Lunar and Solar Mosaics — Ultra-sharp planetary and surface detail
- 💫 Multi-night Projects — Mosaics and high SNR deep integrations
You’re now building your own datasets, not just taking snapshots.
🔭 Essential Gear for Expert-Level Imaging
Here’s where things get serious (and a bit heavier—both in weight and wallet).
✅ Mono Astronomy Camera (Cooled)
- Examples: ZWO ASI2600MM Pro, QHY600M, Player One Artemis-M Pro
- Features:
- High dynamic range
- Low read noise
- Cooling to -10°C or lower
- Excellent for narrowband imaging
- Captures only grayscale; color is added by combining filtered images
✅ Filter Wheel + Filters
- Motorized Filter Wheel with:
- Luminance, Red, Green, Blue filters
- Narrowband: Hα (656nm), OIII (500nm), SII (672nm)
- Top brands: Astronomik, Antlia, Chroma, Baader
✅ Equatorial Mount
- Precision tracking is everything at this level.
- Popular options:
- Sky-Watcher EQ6-R Pro
- ZWO AM5
- iOptron CEM70
- Paramount or 10Micron for high-end observatories
- Must be properly balanced and polar aligned (often with software assistance)
✅ Imaging Telescope
- High-quality Apochromatic Refractor (e.g., Askar 130PHQ, Takahashi FSQ-106, William Optics FLT91)
- Or Newtonian Reflectors for wide aperture at lower cost (e.g., TS-Photon 8” f/4)
- Focusers should be strong enough to support filter wheel + camera
✅ Guide Scope + Guide Camera
- Essential for sub-pixel tracking accuracy over long exposures
- Software: PHD2, or integrated guiding in NINA or ASIAIR
✅ Computer or Controller
- Control all devices via:
- Laptop with NINA, Sequence Generator Pro, Voyager
- Or ASIAIR Plus or StellarMate for portable observatory control
- Use autofocus routines, plate solving, filter sequencing, and automated meridian flips
✅ Dew Heaters, Power Boxes, Cable Management
- You’ll need power distribution, dew control, and clean cable routing for successful overnight imaging
⚙️ Imaging Workflow at Expert Level
- Planning & Framing
- Use Telescopius, Sky Atlas, or Stellarium with your sensor size for framing
- Choose targets based on season, altitude, and moon phase
- Automation
- Use software to sequence:
- Cooling camera
- Autofocus routines
- Plate solving
- Multi-filter exposures
- Guide star acquisition
- Meridian flips
- Exposure Settings
- Sub length: 180s – 600s per filter
- Integration: 5–20+ hours per target
- Gain/Offset: Varies by camera model—balance dynamic range and noise
- Calibration Frames
- Darks: Same exposure/temp as lights
- Flats: For every filter used
- Dark Flats or Bias: Depending on camera behavior
- Data Storage
- Save all data in FITS format
- Backup to SSD or cloud regularly
🧪 Post-Processing Workflow
Expert-level editing happens in tools like:
- PixInsight (preferred industry standard)
- Weighted Batch Preprocessing (WBPP)
- DynamicBackgroundExtraction
- NoiseXTerminator, BlurXTerminator
- Star removal with StarNet++
- Channel combination for SHO or HOO blends
- Photoshop for final polish:
- Star mask blending
- Color pop and sharpening
- Annotation and framing
📈 Advantages of Expert-Level Imaging
✅ Highest possible image detail and color fidelity
✅ Narrowband imaging allows deep sky work even in light pollution
✅ Full control over every imaging parameter
✅ Produces professional-grade images suitable for publication
✅ Enables deep integrations and large mosaics
⚠️ Challenges to Expect
- Steep learning curve with camera software, guiding, calibration, and processing
- Expensive investment (typical setups range from $4000–$15,000+)
- Weather dependency for long integration time
- Gear management and potential failure points (dew, USB issues, cable snags)
- Post-processing time: can take days to weeks for a single image
🧠 Expert Tips
- Use platesolving + framing assistant in NINA to automate perfect composition
- Run a test stack and stretch to catch problems early
- Use masks and star reduction for pro-level image balance
- Participate in APOD forums, AstroBin, AstroBackyard, CloudyNights to get critiques
- Store your calibration libraries organized by temperature/gain/filter
🛰 Sample Setup Scenarios
| Level | Gear Example | Best Targets |
|---|---|---|
| ~$4000 | ASI533MM + Filter Wheel + RedCat 71 + AM5 | Orion, Rosette, Pleiades |
| ~$6000 | ASI2600MM + Chroma Filters + FRA600 + EQ6-R | Veil Nebula, M101 |
| ~$10k+ | QHY600M + Takahashi FSQ-106EDX + CEM70 | Mosaic projects, faint nebulae, galaxies |
🎓 Final Thoughts
At this level, you’re combining the precision of engineering with the creativity of art. The investment is high, but the reward is unmatched. You’ll create images of the universe from your own backyard that rival observatory photos.
“You’re no longer just stargazing—you’re capturing photons that left their source thousands of years ago. And now, they’re on your screen.”
